
Ten tips to make your RV shower better plus bonus boondocking water saving ideas
10 tips for RV showers
How do you shower in an RV? Many RVers actually never use the shower in their RVs because they don’t like or even understand the experience. Showering in an RV is definitely different than doing so at home so here are ten tips for showering in your RV including how to maximize showering in an RV while boondocking.
What is an RV shower?
Many RVs are equipped with bathrooms that include a shower. Some of those also have a miniature tub and there’s actually a use for these.
In many RVs the shower is a plastic enclosure that’s a bit tight so you’ll have a limited amount of space to take care of what you need to. RV showers range in size from very small spaces to almost lavish ones depending on the RV itself.
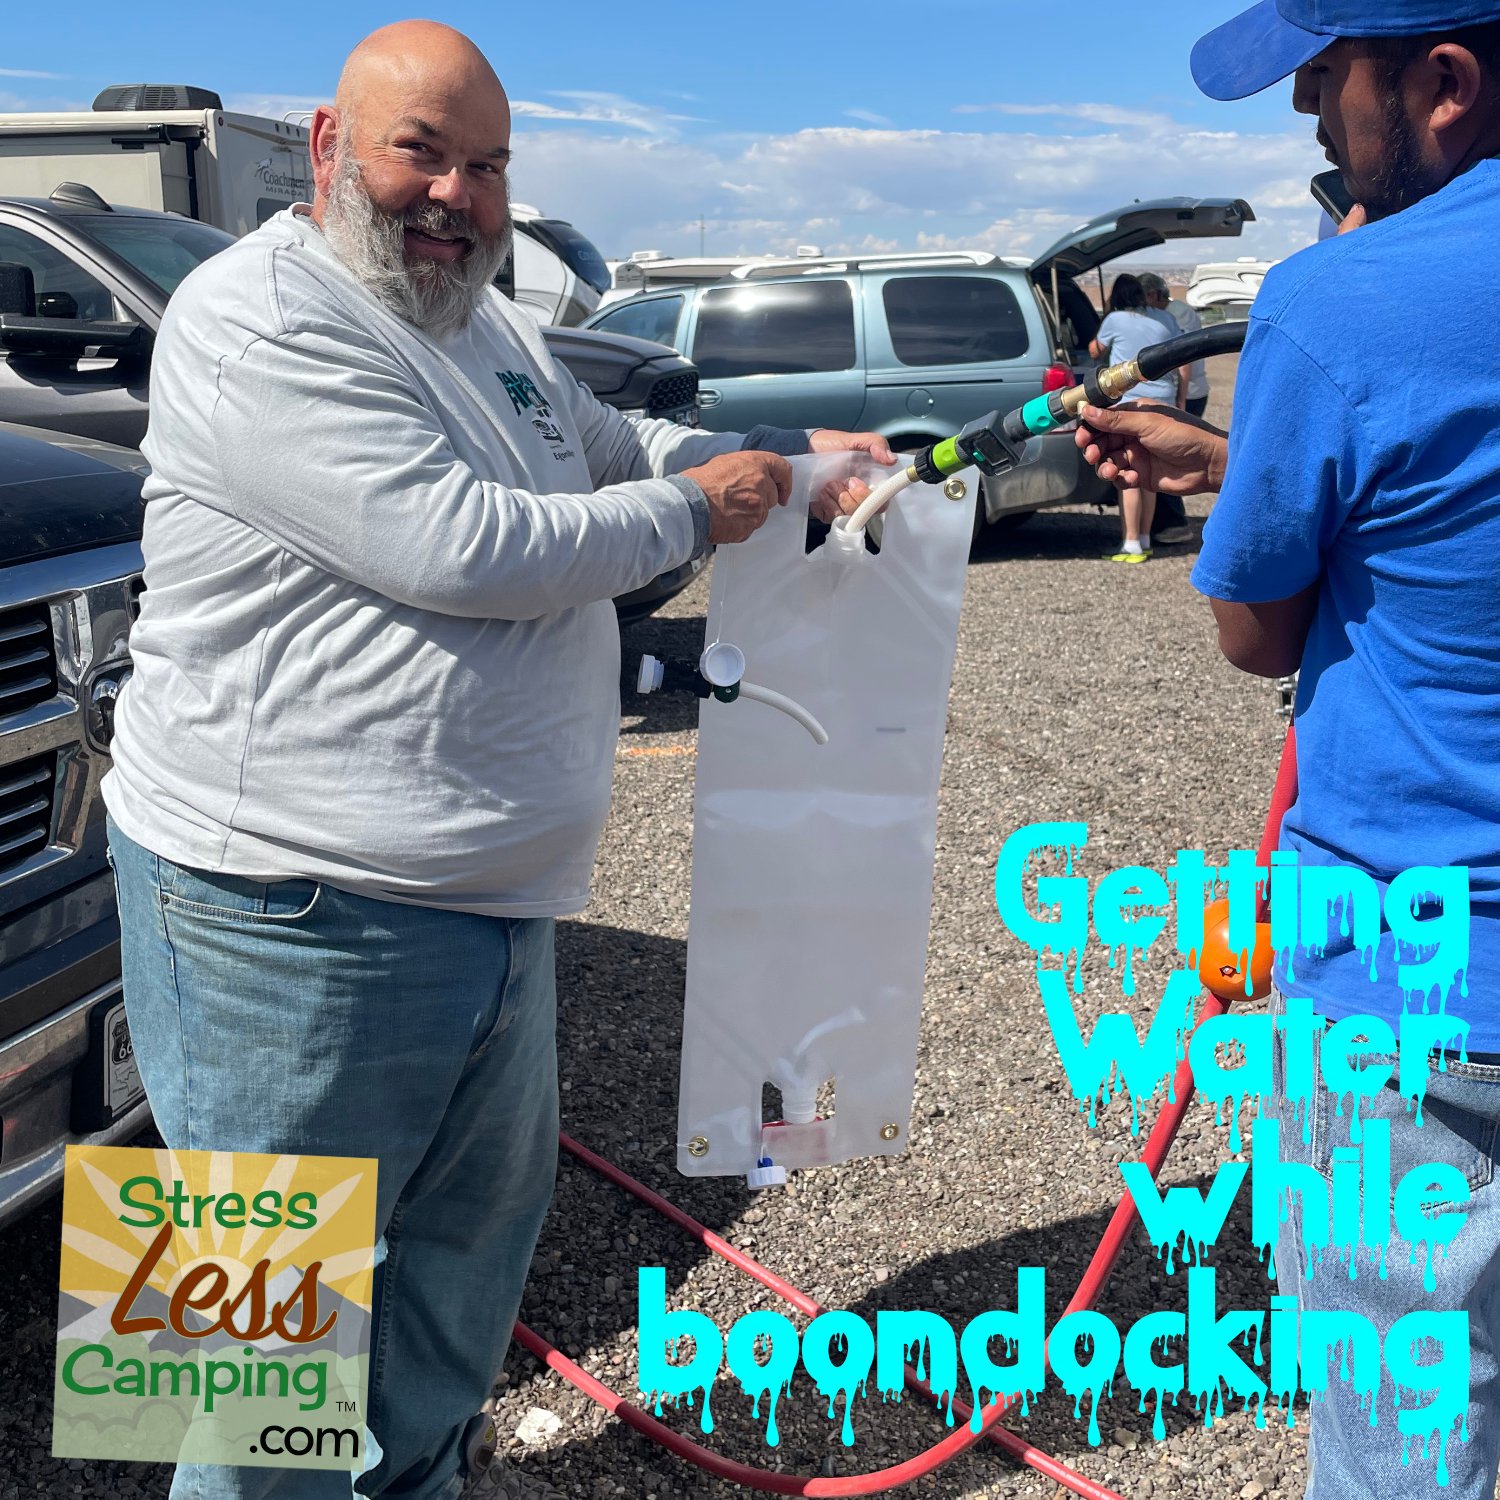
What is often the limiting factor is water. RVs with showers almost always have a way to store fresh water and then a way to capture the water coming down the drain of the shower.
Since it may be true that you’re carrying the water you’re going to be using, there is a limited supply of that water. Even at 150 gallons of water in some very large RVs, that’s still a limiting factor, of course, but not that limiting.
Our RV has 54 gallons of fresh water storage and 30 gallons each of black and gray water storage.
How much water does an RV shower use?
According to this EPA report, a standard household shower uses about 2 1/2 gallons of water per minute (GPM). They also say that the average shower lasts eight minutes. This translates into 20 gallons. Doing the math, you can see that we would really only get one and a half showers before our gray tank was full.
But we can go five days with two showers per day (we each get one!). How?
Minimize your water usage
There are a lot of ways to reduce the amount of water you use in the shower. Probably the simplest way to reduce usage is with what is called a “Navy shower.” Essentially this is where you wet your skin, shut off the water, lather up, and then turn the water back on and rinse off.
Don’t worry, you can do it! It’s surprising how much water this saves.
If you have an RV shower head it likely has a shut off valve but you might notice that the water continues to dribble even when you’ve shut it off. This is actually intentional so that the water maintains temperature and doesn’t surprise you with a hot or cold blast when you turn it back on.
Water repurposing
Another way to dramatically reduce the water going into your gray tank is to capture the water used while waiting for hot water to reach the shower head.
In our Rockwood Mini Lite we have a Showermiser system which redirects the water coming to the shower head back into the fresh water tank. There’s a sheath on the valve and when that sheath changes color, the water is hot. This saves us from just letting the water get wasted down the drain while we wait for it to get hot.
But if your RV doesn’t have this feature you can use a tote or bucket to capture this water that would otherwise be wasted. Then you can use it to flush the toilet. You might be surprised how much water is wasted while waiting for it to get hot at the shower head, particularly in a larger RV where the distance between the shower head and the water heater is greater.

Dry shampoo can be a time and water saver for RVers
Use a lot less water
Recently we discovered the Geyser System which uses a small fraction of the water that you might otherwise use while taking a shower. Using a system that incorporates a sponge and a tube that squirts water into that sponge the Geyser System really works well.
Tony actually prefers it to a traditional shower, Peggy doesn’t, but it absolutely works to reduce water consumption.
Use no water
You can actually use no water for showering in your RV. No, seriously!
While my follicles have long gone into retirement, Peggy has quite a head of hair still and sometimes chooses to use a dry shampoo. I did a lot of research on these since I have no personal experience with it but, apparently, it’s not really a cleansing product. Instead it just absorbs oils and may add body to your hair. So this isn’t a routine replacement, but one that you can use occasionally.
It’s still a worthwhile thing to be aware of and can be used without stepping foot into the shower. I think Peggy’s hair looks great after she’s used it if that makes any difference.

Venture Wipes - a great alternative to showering
There are also large wipes that we like called Venture Wipes. These are like those baby wipes you might already be familiar with, but are quite large. These are a complete substitute for a shower and are good to have on hand for a number of reasons.
They absolutely accomplish the task of cleaning oneself. Not only are they rather large, but remain moist throughout the entire process. Even if the amount of skin you have is larger than average (speaking for myself) these still work very well.
Just remember to start at the top and work your way down because, well, just because.
Each of these wipes comes in a sealed package and they’re also good to have on hikes in case you need to clean something off but the shower is still down the mountain.
For shaving the modern electric razors are pretty darned good - I use one of these to shave my head and have used one even when I didn’t have a beard. Of course having a beard means I don’t have to shave every day but, if I did, I would use an electric razor. I never used mine in the shower for a variety of reasons but saving water is certainly one of those.
My personal preference is the Norelco brand and I’ve been using one ever since I first started shaving. Nowadays they’re rechargeable and the batteries seem to last for weeks before needing to be recharged. Of course, for me, the batteries last a very, very long time.
Our RV shower with the doors removed
Making the RV shower better
There are a number of ways we’ve found to make the shower itself better in an RV.
Quite literally the first thing we did when we bought the new trailer is to replace the shower head. For whatever reason the shower heads in RVs are usually terrible, although I’m seeing a few now that are better.
But in our first Rockwood we put in an Oxygenics shower head and have been very pleased with that. When we got the new Rockwood they happened to sell these at the dealership and it’s the first RV gadget we bought.
The difference in quality of water flow and how it feels is incredible. The standard RV shower head is more a wetness suggestion, the Oxygenics gets the power washing done even with lousy water pressure.
But if you do have lousy water pressure and you’re hooked to city water, you can always fill up your fresh water tank and use the on-board water pump in your RV. Typically these operate at between 40-60 pounds per square inch (PSI) and they’re consistent. Using the on-board pump might just solve your low water pressure blues.
We also took the shower door out of our own RV and replaced it with a shower curtain. In our newest Mini Lite we actually talked Rockwood into leaving all the door hardware off entirely so I crafted a shower curtain road out of PVC pipe and Pex pipe. It works really well. Remember, though, just because I did something doesn’t make it normal.
Removing the shower stall in our RV.
Not all RVs have taller ceilings and the pan of the shower has to be above the floor per code. So, if you’re shopping for an RV, step into the shower and make sure you can do everything you have to do. I’ve seen where taller campers just can’t wash the tops of their heads.
Know that most RVs have a skylight in the shower which is in an open section of the ceiling. You can use this headroom if needed - that’s actually why it’s up there. But it’s funny for some taller travelers as you are almost a human periscope looking around inside that bubble.

Replaced the glass shower door with a shower curtain with rods made of PVC pipe
RV water heater
The RV water heater is another source of trouble for some campers. Traditionally this has been a six gallon propane-electric unit. These heat the water with propane or electric power.
These things typically heat the water to 140°F which is pretty hot - it can actually scald you. On most of them there is no provision to adjust the temperature. The thinking with these is that you have such hot water that you mix-in a lot of cold water to compensate which makes six gallons of hot water sufficient.
The problem is this is hot, hot water and some younger campers don’t understand this.
Typically using propane heats the water the fastest just because of how much energy is in liquid propane. But if you’ve paid for a site with electric, it just makes sense to use that. The electric heating system just heats the water more slowly. How long? Typically about 20 minutes or so if the water is cold.
You want to be absolutely sure that there is no air in the water heater before you turn on the electric heating system so run a hot water faucet in your RV until it stops “spitting” before you ever turn on the heating element in the water heater.
If you’re in a bigger hurry, you can use both propane and electric at the same time.
A number of new RVs are coming with tankless propane water heaters which heat the water on demand. While some call these “instant” water heaters there is still a delay while the hot water goes from the water heater to your shower head.
A few more tips
One of the things I complain about frequently in my Honest RV reviews column are the worthless vent fans in most RVs, particularly towables.
RV vent covers let you keep vents open even in inclement weather
Moisture is a real problem in RVs as it’s a very small space and can build up moisture easily. So whenever you shower make sure that the vent fan in the bathroom is on and the vent lid is open to let air and moisture escape.
If your RV doesn’t have one, I highly recommend an outside vent cover that will let you keep the skylight vent open even in inclement weather. In many cases the installation of the vent in your RV will already have provisions to mount one of these so the installation of the vent cover may be quite simple.
Also, if the company who made your RV didn’t put a good vent fan in, it’s well worth it to do so yourself. My favorite are the MaxXair vent fans but you can save a bunch of money and do well with a Heng’s replacement fan. These are really easy to install and cost under a hundred bucks.

Lastly, if you have an plastic RV shower enclosure and notice that there isn’t any sealant between the wall section and the bottom, that’s the way it’s meant to be. Under the wall section there is a lot of overlap that is designed to accommodate expansion and contraction of the walls in an RV and also keep water out.
If the walls in the shower or tub of your RV are the “wallpaper” that’s in the rest of your RV, you’re okay with one big “but.” Isn’t there always a big “but?”
I would strongly suggest you wipe down the walls in the bathroom after each shower. That wallpaper material is only okay at keeping moisture out.
Honestly if my RV didn’t have a plastic shower enclosure I would get some FRP or other plastic wall material and install that. Plastic is terrible in the oceans because it’s also great in the shower of an RV for the same reason - water doesn’t really break it down.
So there are my tips. Did I miss anything? You can comment below or join us at our fun and friendly StressLess Camping Podcast Facebook Group and weigh-in.