
RV leak detection and RV leak repair for StressLess Camping
How to tell if you have a leak in your RV
Many people don’t realize that the various seals, joints and holes in an RV’s skin are sealed with a material that is actually considered a maintenance item. When I worked at the dealership many RVs would come to us that were only a few years old and, upon detailed inspection, it was clear that water was already getting into the walls and compromising the structure of an RV. What can you do?
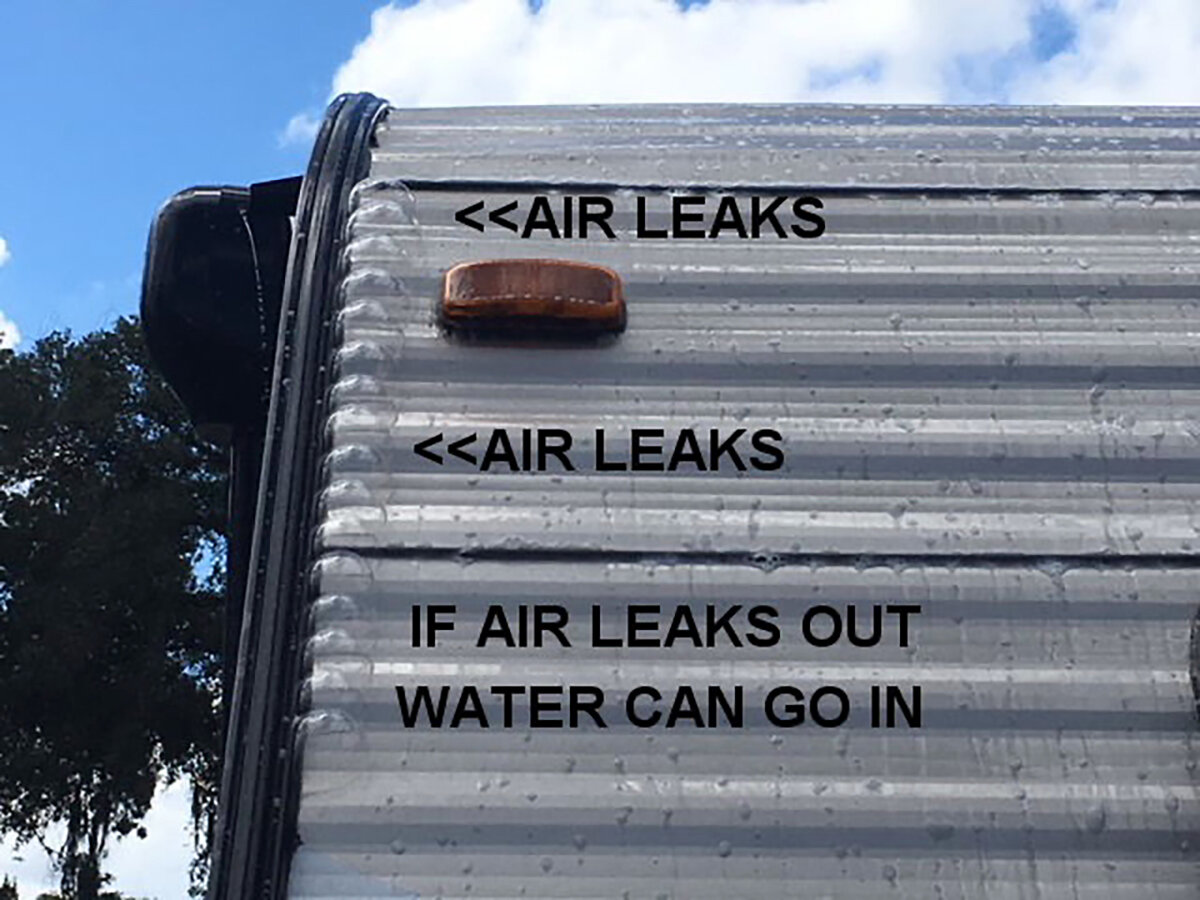
A case where the laminated surface of the trailer came apart due to the damage from a leaky marker light.
Here is a list of ways you can prevent water from getting into your RV and causing minor, and even major damage.
Any place the outer skin of your RV is punctured in any way the RV manufacturer will seal up that hole with some form of flexible sealant. This basically looks like the type of caulk you’d see used in your home’s bathroom or kitchen but is a very different material based on how your RV is built and the components used in that construction.
While it may seem solid, just driving down the road causes a great deal of flexing and movement in an RV’s structure and all these seals have to remain flexible and able to cope with this structural movement. But this also means that it’s a wear item so it’s your job to make sure these seals remain intact and do their jobs.
It might not be obvious but these holes in the surface can include screw holes in places like where the awning is attached, holes for baggage and entry doors, screw holes where the water and electrical ports are and, of course, those baggage door holes, holes for the ports and even windows and doors.
The sealant material on a corner of a relatively new RV is already beginning to fail, allowing for water intrusion.
Furthermore the roof is also full of holes including vents, air conditioner, exhaust ports and any other holes in the structure including screw holes. Your roof may have been guaranteed for 10 or 12 years but that’s the membrane on the roof itself. All these various holes that are punched in the material are considered maintenance items and it’s up to the owner to keep them in good condition.
When you know what you’re looking at there are actually quite a few holes in the surface of your RV. Furthermore most RV manufacturers recommend that you do an inspection at least every 90 days of the surface of the RV looking for leaks.
One area a lot of people don’t consider is the screw holes under the decorative trim that is topped with the plastic strip on the edges of almost all RVs. Each of these screw holes is generally covered with a sealant and then the plastic strip of trim (called insert trim) which goes above the whole assembly. Here’s a video about just that.
In the case of our travel trailer I am pretty meticulous about looking at the various seals and such but missed the fact that one of the upper marker lights hadn’t been sealed properly. I did find out when it began to leak.
Like most smooth-sided RVs ours is comprised of a sandwich of material that includes an outer fiberglass skin, an inner Luan wall, either insulation or an aluminum structural rib, then another inner Luan wall which has a decorative surface forming the interior wall.
When water gets into this sandwich it causes the materials and glue to fail which is called a delamination. That delamination was the first sign that that marker light hadn’t been sealed properly and resulted in a pretty pricey repair.
Mitigating major water damage caused by a leaking marker light
Again, it’s good to go over any area where there may be holes punctured in the surface of your RV to make sure they’re sealed properly.
I will say that the recommendation is strictly to inspect the surface of the coach. Often times it will be fine for years, but you don’t want physical damage to be the first indicator that there’s a problem.
The manufacturer of your RV will have recommendations of which product or products should be used to re-seal the holes if you do see signs of a compromise or wear. What you use will vary depending on the construction of your individual RV so check with the manufacturer.
A Step Above
Recently I saw a Facebook post by Wayne Trent who went above and beyond the normal visual inspection of his RV.

While I’ve seen this done before, Wayne provided a very detailed photographic story and gave us permission to share his story and photos.
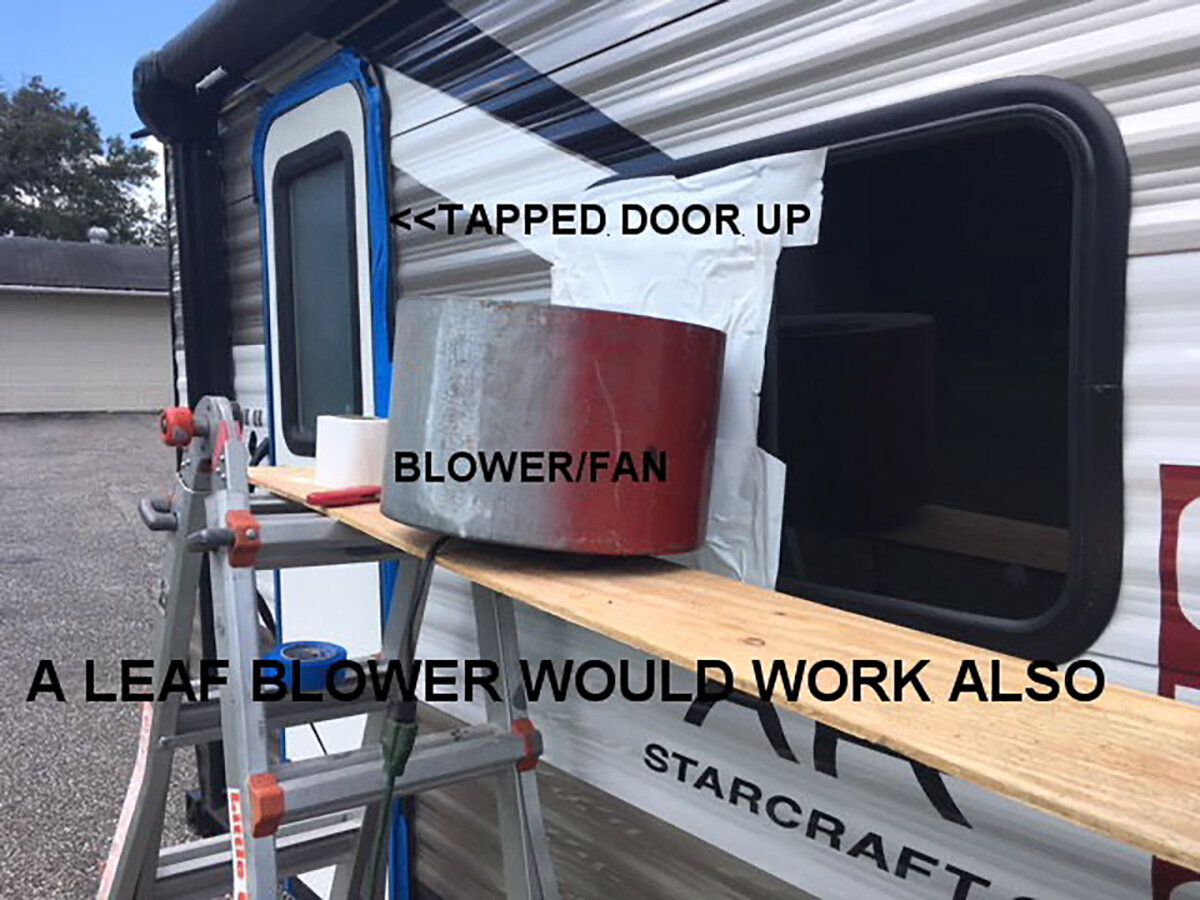
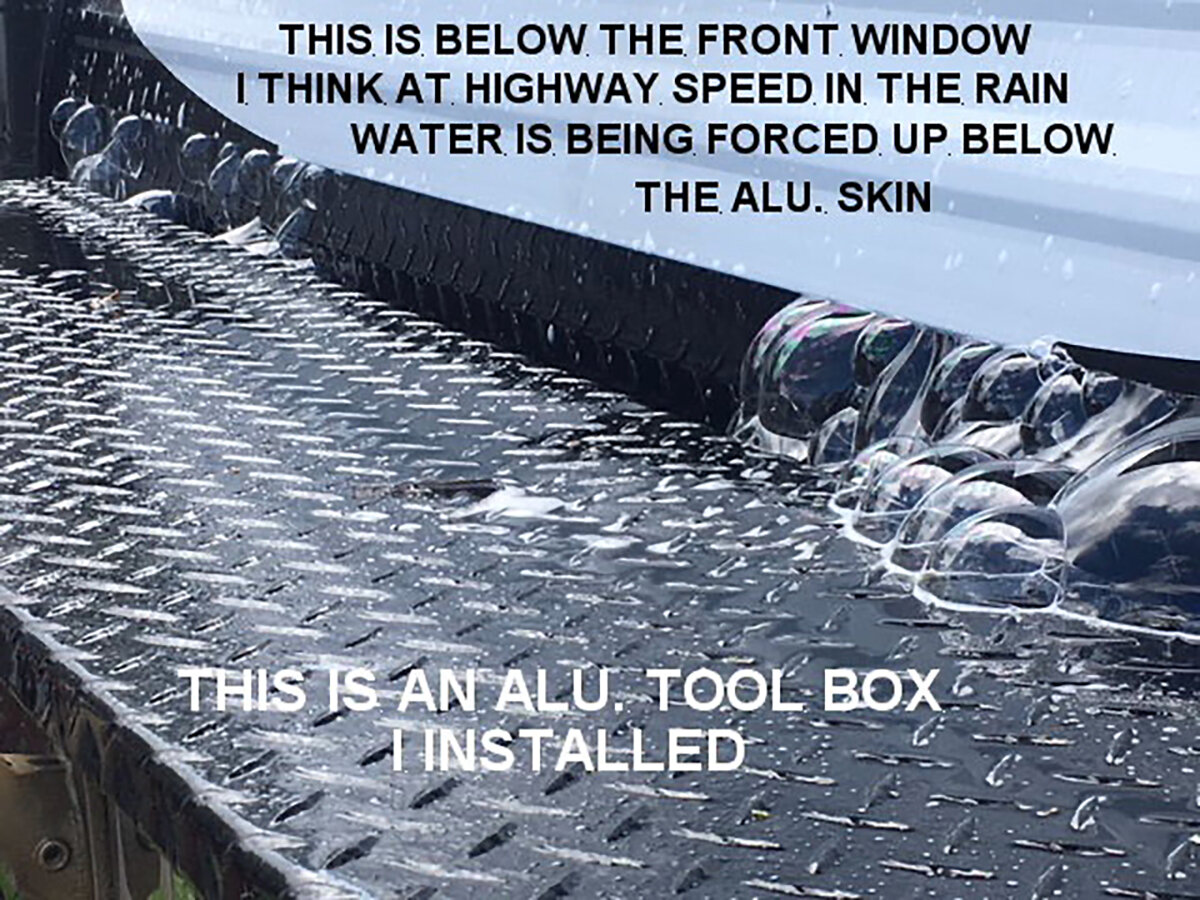
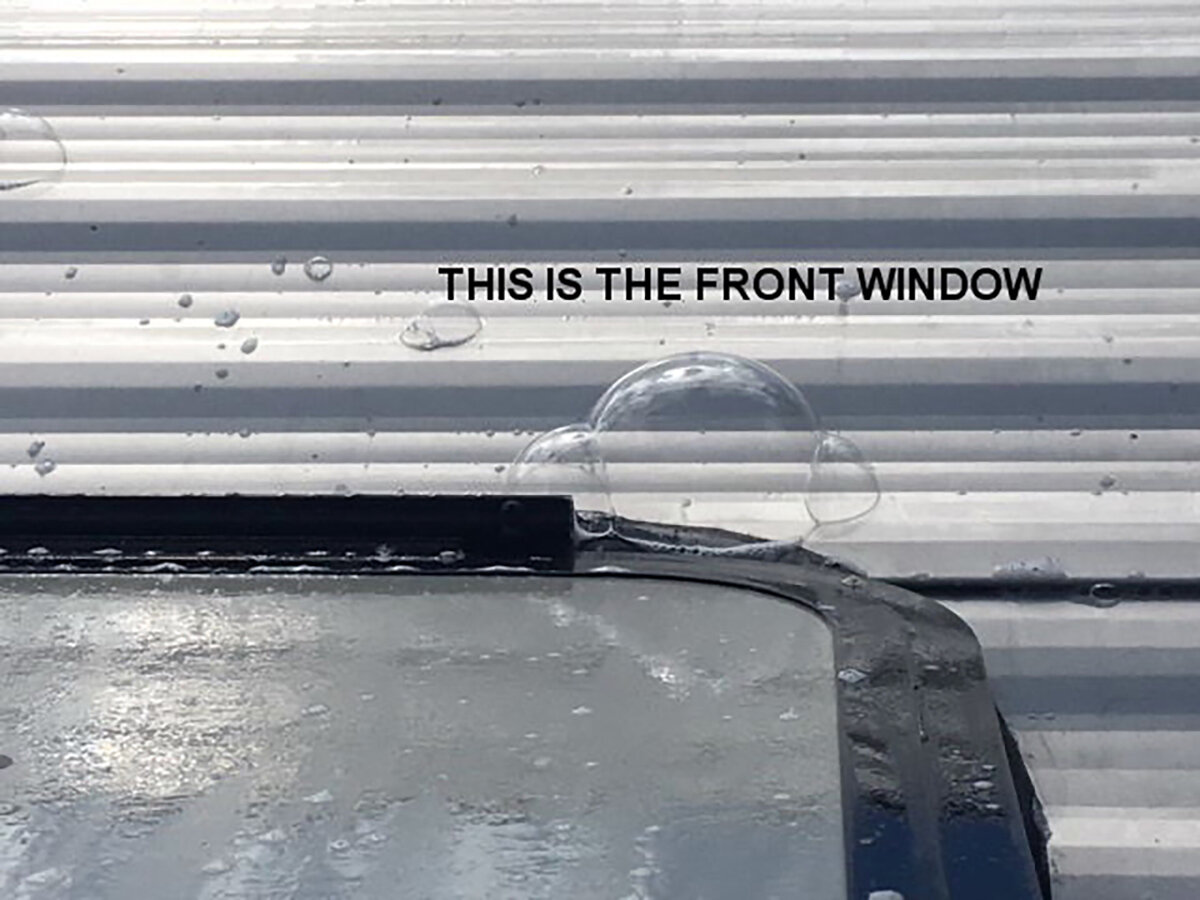
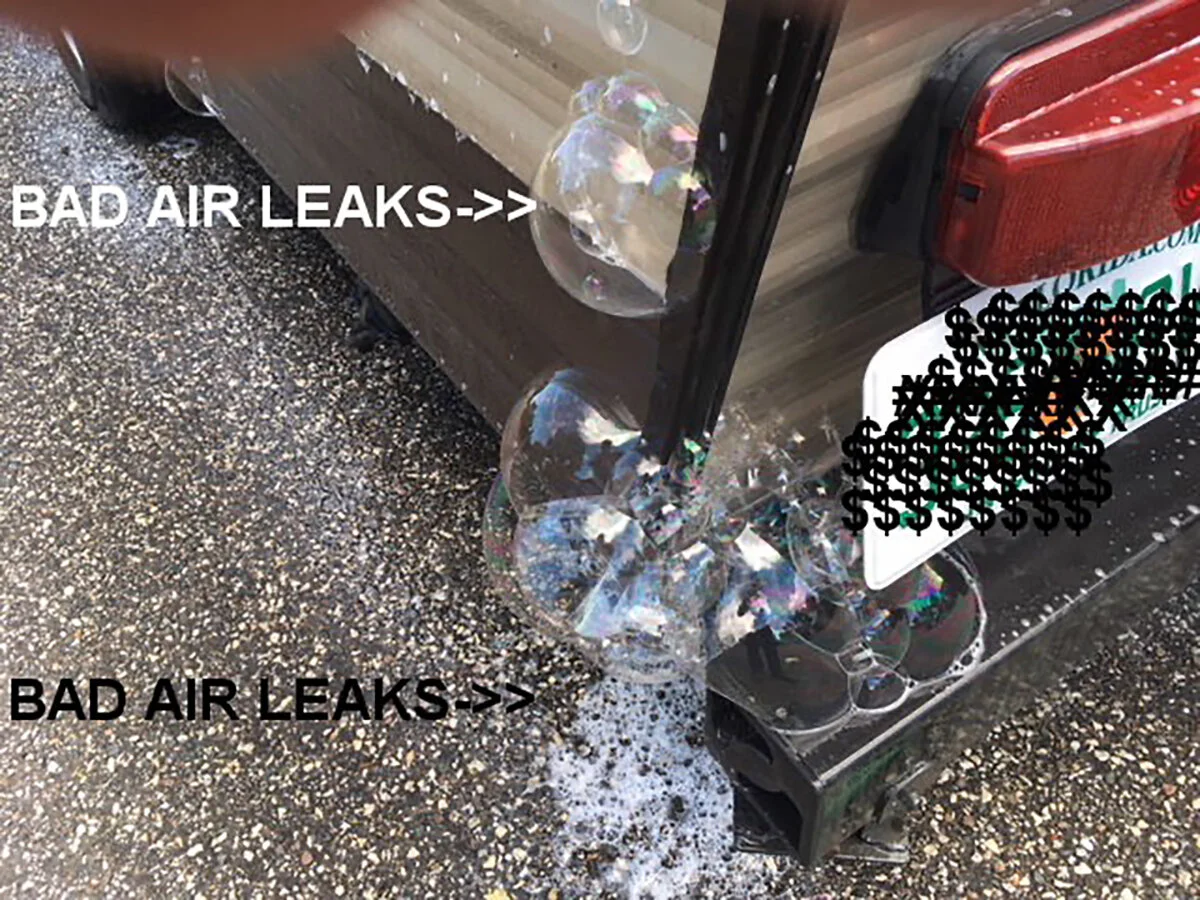
Some RV manufacturers essentially pressurize the RV with air at the final assembly stage and then spray soapy water over the coach to see if any bubbles show up, which would indicate a leak. Wayne did exactly this.
His first step was to open one of the baggage doors in his RV and create an insert in the door that was the same size as the door. Then he cut a circular hole in the insert that fit his shop vacuum.
He then put the insert in and sealed it and the hole for the shop vacuum with painter’s tape. He then also sealed things like the heater exhaust hole, the water heater exhaust, the door and any other obvious place where air could get out.
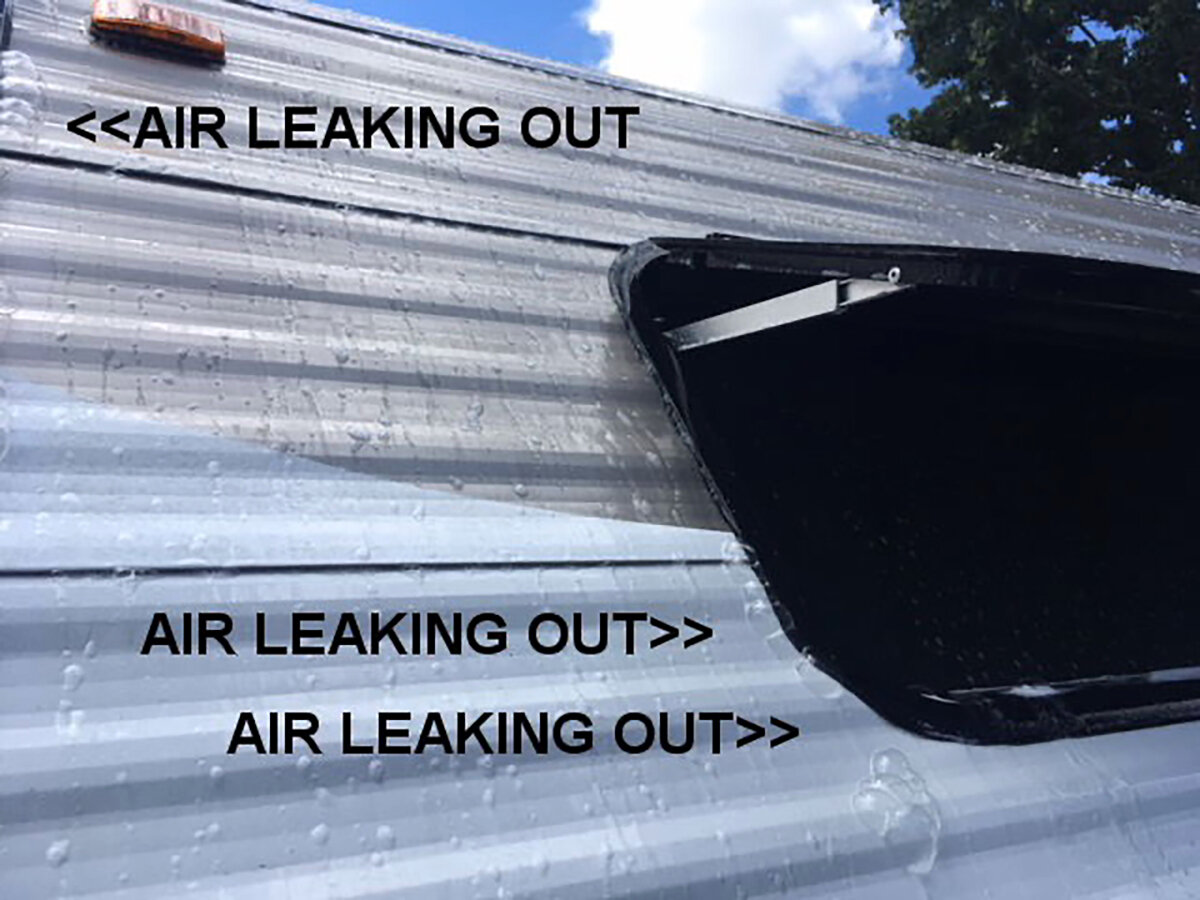
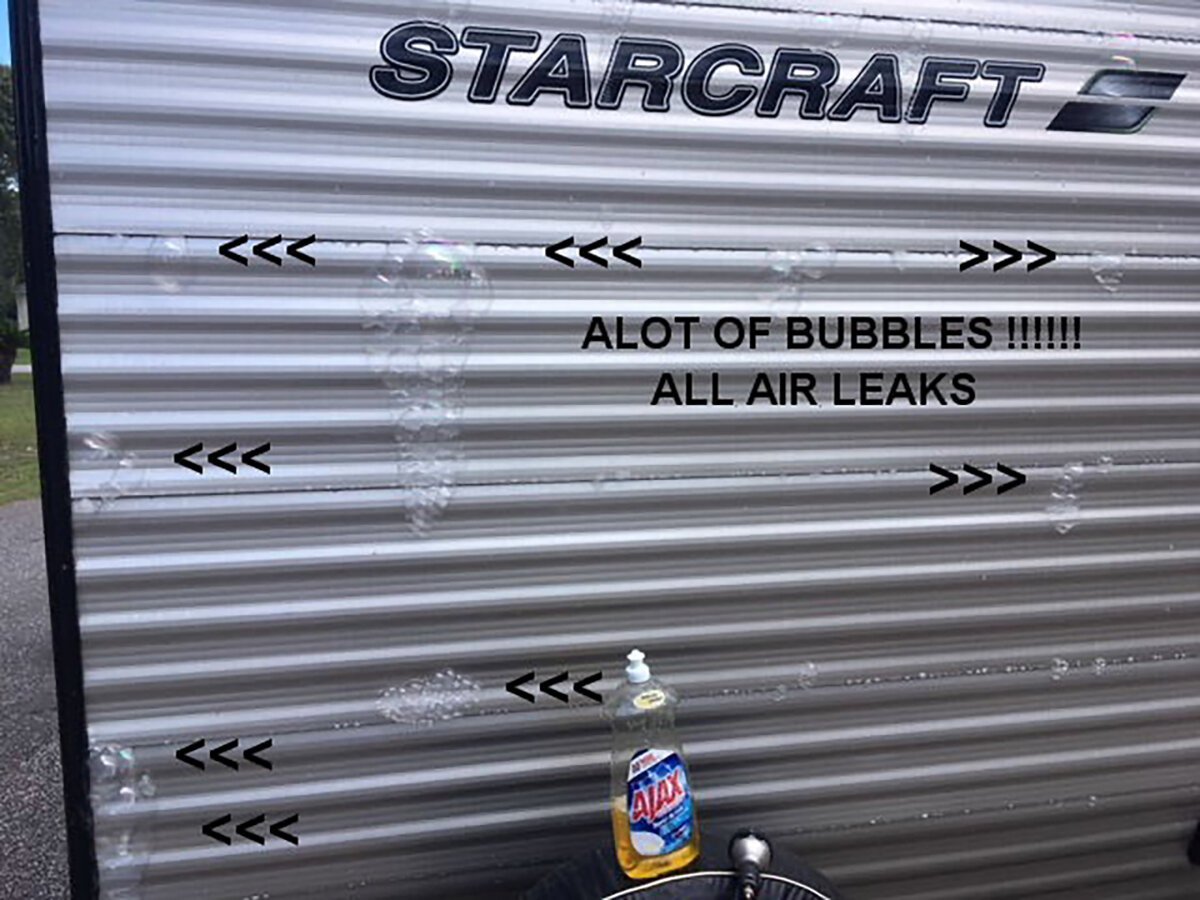
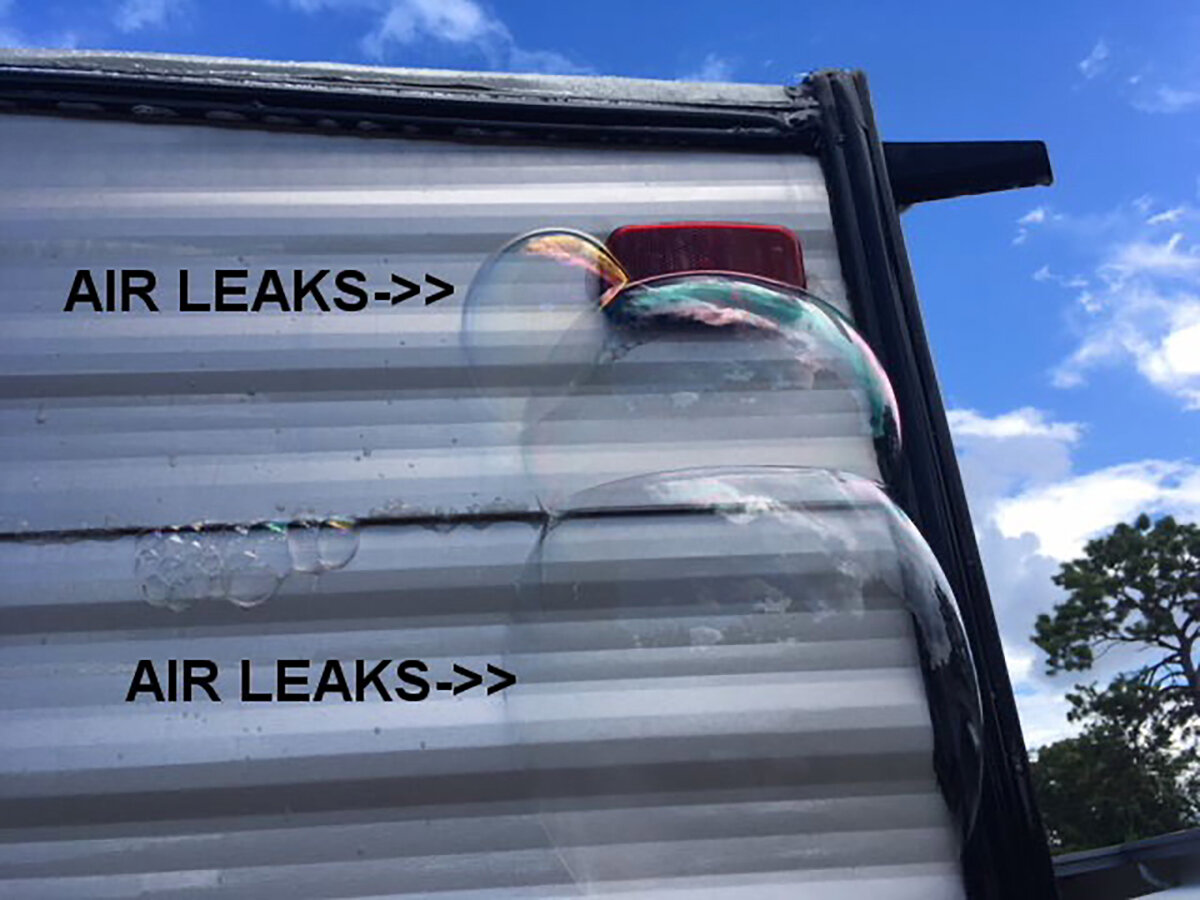
Wayne then put the hose in the vacuum such that it would blow air and kicked it on. From there he went around the RV with soapy water in a spray bottle and was absolutely shocked at the number of leaks he found in the surface of the RV.
Clearly the manufacturer didn’t do a good job sealing his rig and he had to replace a tremendous amount of sealant on the exterior of the coach. But he did replace the sealant and now his travel trailer will likely give him many years of trouble-free enjoyment.
While Wayne’s efforts might seem extraordinary they’re actually not that difficult to reproduce and the results can be either alarming or comforting depending on the job the manufacturer did with your RV.
Sadly we saw a lot of newer RVs come in to be traded-in that were already having major issues with leaks. As a consequence of this, water had gotten into the body of the vehicle and, in some cases, mold was already forming in them.
Simply setting a regular schedule to inspect and mitigate any surface leaks in your RV could spell the difference between many, many years of trouble-free enjoyment or a series of events that could not be described as StressLess Camping.


